
Last Updated: October 31, 2026
Quick Summary
To plan school flooring installation, survey every room and record floor areas, doorways and fixed furniture, then test the subfloor for moisture and flatness before specifying materials room by room. Phase the work around term dates, keeping fire exits open and leaving a buffer week for snagging.
- Measure each room at its widest and narrowest points, as older buildings are rarely square.
- Test every room for moisture and record readings against the manufacturer’s maximum before fitting.
- A common flatness criterion is 3mm over a 2m straightedge, but check the manufacturer’s tolerance.
- Match materials to use: carpet tiles or vinyl for classrooms, sheet vinyl or rubber for corridors.
- Leave a buffer week before term starts for snagging and returning furniture.
Table of Contents
- Step 1: Survey the Site and Plan the Layout
- Step 2: Check the Subfloor and Test for Moisture
- Step 3: Specify the Right School Flooring for Each Space
- Step 4: Preparing a School for Flooring Installation
- Step 5: Plan Phased Flooring Installation in Schools Around Term Dates
- Step 6: Build the Commercial Flooring Installation Timeline
- Step 7: Understand School Flooring Cost Factors and Whole-Life Value
- Request a Site Survey and Installation Quote
- Frequently Asked Questions
Step 1: Survey the Site and Plan the Layout
How to plan school flooring installation starts with a proper site survey, not a catalogue. A good survey maps every room, records how each space is used, and flags access routes before a single roll of vinyl is ordered.
Walk the building during a normal school day if you can. You will spot things a quiet weekend visit hides: where pupils cut corners, which corridor takes the brunt of foot traffic, and where doors scrape the floor.
Measuring Rooms and Setting Out the Floor Plan
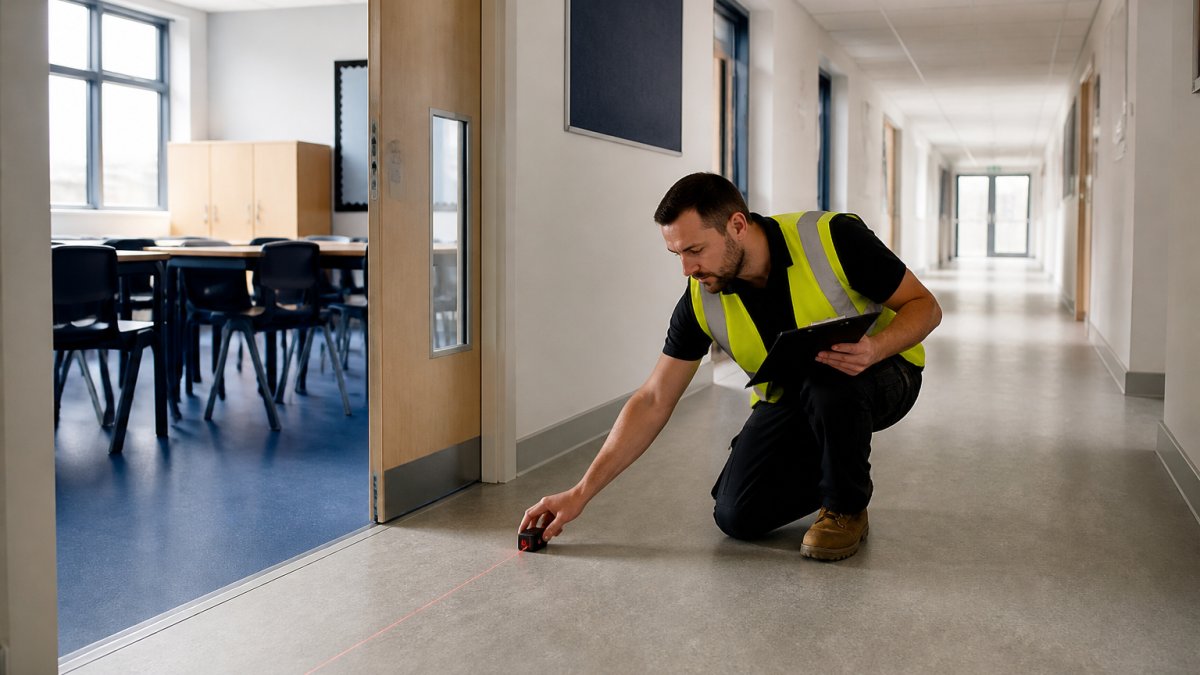
Measure each room’s length and width at the widest points, then again at the narrowest. Older school buildings rarely have square corners, and a room that looks rectangular can be 50mm out across its length.
Record for every space:
- Floor area in square metres
- Doorway widths and swing clearances
- Fixed furniture, radiators and pipework
- Existing floor covering and how it is fixed
- Ceiling height for access equipment
Set a centre point for the layout in each room. Run your first tile or plank line from it so any cuts fall at the edges, not down the middle of a sightline. For corridors, plan the layout along the longest run so joins sit away from entrances.
Step 2: Check the Subfloor and Test for Moisture
Subfloor condition decides whether your new floor lasts five years or fifteen. Skipping moisture testing is a common and costly mistake. A floor laid over damp concrete will lift, blister or fail, and the fix means stripping everything back and starting again.
A school-specific plan benefits from a documented testing regime with acceptance criteria, because school buildings often have large concrete slabs, older screeds and patchy damp-proof courses that behave differently room by room.
Moisture Testing Methods and Acceptance Criteria
Use the right test for the slab. For concrete, a hygrometer or calcium carbide test gives a reading you can act on. For a school flooring project, record readings room by room and keep them with the survey file so the contractor and the school business manager can see the same numbers.
A practical testing checklist:
- Test every room, not a sample, because damp patches near doors and external walls are common
- Record the test method, date, location and reading for each room
- Compare readings against the flooring manufacturer’s maximum moisture content for the chosen covering
- Re-test after any remediation before fitting
Where readings run high, plan a surface damp-proof membrane and a suitable smoothing compound. Remediation adds time to the programme, so build it in early rather than discovering it on day one.
Subfloor Flatness, Tolerances and Remediation
Flatness matters as much as moisture. A common acceptance criterion is 3mm over a 2m straightedge, but check the chosen manufacturer’s tolerance because some coverings are stricter. Record deviations room by room.
Check these points too:
- Cracks, hollow spots and loose screed
- Old adhesive residue that needs removal
- Damp patches near doors and external walls
- Contamination such as oil, paint or plaster that prevents adhesion
Where the subfloor fails, the remediation options are usually a smoothing compound for minor deviations, a repair or patch for local damage, and a damp-proof membrane where moisture is the issue. Each option adds a drying or curing period, so the programme must allow for it.
Do not let fitting start until moisture readings and flatness are signed off. Rushing this step is the main cause of adhesive failure and uneven finishes in school projects.
Keep the test results, photographs and remediation records in the handover file. They are useful evidence if a warranty claim arises later.
Step 3: Specify the Right School Flooring for Each Space
No single material suits a whole school. Classrooms, corridors, halls and kitchens each put different demands on a floor. Specification should follow room use, not a single budget line.
Matching Flooring Materials to Classrooms and Corridors
Classrooms need quiet underfoot and comfort for pupils sitting on the floor. Corridors need slip resistance and wear resistance against heavy foot traffic. Here is how the main options compare:
| Space | Best Material | Why It Works |
|---|---|---|
| Classrooms | Carpet tiles or vinyl | Acoustics and comfort; tiles allow spot replacement |
| Corridors | Sheet vinyl or rubber | Slip resistance and heavy wear resistance |
| Halls and dining | Rubber or safety vinyl | Impact absorption and easy cleaning |
| Science and art | Sheet vinyl with welded seams | Chemical resistance and hygiene |
| Entrances | Entrance matting plus vinyl | Traps grit before it reaches the floor |
Check slip resistance ratings against the actual use. Wet areas and entrances need a higher rating than dry classrooms.
Step 4: Preparing a School for Flooring Installation
Preparing a school for flooring installation is as much about people as it is about the floor. Furniture removal, protecting routes and clearing each space come before any adhesive is opened.
Plan the practical side:
- Agree who moves furniture and ICT equipment
- Protect corridors and stairwells with hardboard or protective sheets
- Book skips and waste collection for old coverings
- Confirm power and water access for the fitters
- Brief caretaking staff on daily start and finish times
Health and safety on a live school site needs a written plan. That covers safeguarding for contractors working near pupils, secure storage for adhesives and tools, and clear segregation of work areas. Safety methods are maintained on every project, and on school sites that means controlled access and secure storage of adhesives and tools during the school day.
Step 5: Plan Phased Flooring Installation in Schools Around Term Dates
Phased flooring installation in schools works best when the programme follows the school calendar, not the other way round. Split the building into zones and schedule each zone for a holiday or a quiet period.
A workable phasing approach:
- List every room and rank it by disruption if closed
- Group rooms into zones that can be closed together
- Match zones to half-terms, INSET days and the summer break
- Keep at least one route to every fire exit open at all times
- Leave a buffer week before term starts for snagging
Summer gives the longest window for large areas like halls and corridors. Half-terms suit single classrooms or a toilet block. Out-of-hours fitting covers smaller rooms during term without closing them.
Sequencing Rooms, Corridors and Shared Spaces
Sequence the work so that shared spaces are not all closed at once. A common pattern is to start with classrooms that can be decanted, then move to corridors and shared areas once term has ended. Corridors need particular care because they are both a work area and an escape route.
Plan access routes before work starts:
- Agree a contractor route that avoids pupil areas where possible
- Keep fire exits clear and sign alternative routes if a corridor is closed
- Protect stairwells and doorways with hardboard or protective sheets
- Confirm where materials and waste will be stored so they do not block routes
Safeguarding considerations are part of phasing, not an afterthought. Contractors working near pupils need controlled access, secure storage for tools and chemicals, and clear segregation of work areas. Brief caretaking staff on daily start and finish times and on which zones are out of bounds.
Build a simple zone map showing which rooms are closed on which dates, and share it with the school business manager and site supervisor. It prevents the common problem of a corridor being closed without the staff who need it knowing.
Leave a buffer before term starts for snagging and for furniture to return. A programme that finishes the day before pupils return leaves no room for the unexpected.
Step 6: Build the Commercial Flooring Installation Timeline
A commercial flooring installation timeline for a school is best planned in clear phases, such as preparation, subfloor works, fitting and handover, with each phase given its own slot in the programme.
| Phase | Typical Duration | What Happens |
|---|---|---|
| Strip-out and prep | 1-3 days per zone | Old floor removed, furniture cleared |
| Subfloor works | 1-2 days per zone | Screed, smoothing compound, moisture control |
| Fitting | 2-5 days per zone | Adhesive, laying, cutting, welding seams |
| Handover | 1 day per zone | Inspection, cleaning, snagging, sign-off |
Add drying time between subfloor works and fitting. Smoothing compounds need to cure before the covering goes down, and rushing that step undermines everything above it.
Step 7: Understand School Flooring Cost Factors and Whole-Life Value
School flooring cost factors run well beyond the price per square metre.
The main cost drivers are:
- Floor area and number of rooms
- Subfloor condition and remediation needed
- Material choice and slip resistance rating
- Phasing and out-of-hours working
- Furniture moves and protection
- Waste removal and old covering disposal
Whole-life value matters more than headline price. A vinyl that lasts fifteen years and takes spot repairs beats a cheaper floor replaced twice in the same period. Ask for lifecycle comparisons, not just a single figure.
Pricing depends on area, access, subfloor and programme. For current prices or a quote, please visit the RW Flooring website.
Request a Site Survey and Installation Quote
Getting the plan right at survey stage saves money and disruption later. If you are weighing up materials and phasing for a school project, you can request a quote from RW Flooring.
RW Flooring has over 15 years of experience in commercial flooring. The business offers out-of-hours fitting, complete solutions from subfloor preparation to final installation, and safety methods are maintained on every project.
Frequently Asked Questions
How long does school flooring installation take?
The timeline depends on the area, material choice, moisture readings and whether adhesive or screed needs time to cure. For a project-specific timeline, please request a quote from RW Flooring.
Can flooring be installed during school holidays?
Out-of-hours fitting is available, which can help keep disruption to a minimum. For scheduling options, please request a quote from RW Flooring.
What flooring is best for classrooms and corridors?
The right school flooring balances wear resistance, noise reduction and cleaning needs for each space, so specify room by room rather than choosing one material for the whole building. For material advice for your project, please request a quote from RW Flooring.
What should a school include in a flooring installation budget?
School flooring cost factors include material and area, subfloor preparation and moisture testing, adhesive and accessories, out-of-hours labour, furniture removal, waste disposal and contingency. Whole-life cost matters more than the headline figure: a floor that lasts 15 years costs less per year than a cheaper option replaced twice. To understand what your project would include, please request a quote from RW Flooring.
